Showing posts with label Product Review. Show all posts

Thursday, June 21, 2018

International Quilt Market - and a Product Review

My travels took me to International Quilt Market in Portland in late May.

I presented a talk at 'Schoolhouse' for shop owners. I spoke about using displays in their shops and showed quilts using upcoming Banyan Batiks collections.

Thanks to the Northcott/Banyan Batiks staff and my husband for showing quilts while I was speaking. And to the Marketing specialists who created a slide show of ideas.

My Extra Special thanks go to all the designers who provided their quilts for everyone to see!

Here are a couple of displays I created at home:

Banyan Batiks - Winter Light - Pattern coming soon
Darling Lace - Pattern coming soon for this collection too

***************

I love going to Quilt Market. I get to visit with old friends and colleagues and see all the great new fabrics, quilts and products that are new.  

One friend I met up with was  Joan Ford of Hummingbird HighwayJoan has a 2nd company, Pudgie Parrot, and a great New Product called Your Nest.


If you know Joan, you know that she is crazy for BIRDS!  And what a great name for this product.  You can 'keep stuff handy' - in the sewing room, in your office, wherever you need to 'corral' stuff.

I'm using mine to hold several rulers, my rotary cutter and several marking and sewing tools.


Of course I chose the Hummingbird (lime green) colour.

You can choose Martin (purple), Peacock (turquoise) or Flamingo (pink) for YOUR Nest.

Think I need to get the other colours for my office and one for the kitchen would be great too.

Joan is working on having Your Nest distributed in Canada - know a distributor? Let them know about this great product so we can get them through our Canadian shops too!


Thursday, October 12, 2017

Product Review - Olfa Folding Cutting Mat

When I was teaching on the Alaska Cruise in August one of my students had a folding cutting mat. I wondered if it really worked and she offered to let me give it a try.  It worked very well - no skipping when I cut in the 'fold area'.

So when I got home I bought one. It will be perfect for travel or when going to workshops. It fits in my small suitcase or even in my sewing machine case!

This is the mat folded up. It measures approximately 12" x 17-1/2".


And when it is unfolded you have a full size 17" x 24" cutting mat. 


I can cut strips of full width fabric and the mat is the
same quality as all the other Olfa mat sizes.


If you are in the market for a new mat, why not give this one a try. Perfect for home and for travel use.


Thursday, October 20, 2016

Product Review - Bloc_Loc Ruler

Here is a 'sneak peak' of an in-progress quilt on my design wall. 

I want to make a 'scrap' quilt with Island Batik fabrics and solid white. I am working diagonally through the colour wheel.  


I just started making a few yellow blocks and liked how they looked. I have sorted my fabrics and continued making blocks and arranging them on my design wall.

Then it hit me! I will need 800 Half Square Triangles for this quilt! The quilt will be 10 blocks x 10 blocks = 100 blocks; and there are 8 Half Square Triangles in each block.

I don't think I would have started if I had done that math at the beginning but I'm moving along well with the Bloc_Loc ruler!

The helpful assistant at one my local quilt shops told me the Bloc_Loc ruler was great for squaring up half square triangles.


I always make these by using squares that are cut slightly larger than the size I need and I 'square them up' so they are perfect every time. I usually use my 6" square ruler to trim them square.

The Bloc_Loc has a diagonal groove on the underside, designed to 'lock' into place along the seam line. When I first put the ruler on my half square triangle I knew something was wrong. 


If I had trimmed with the ruler in that spot I would definitely be trimming too much!

I had to turn the ruler around, be sure that it was 'locked' and that the block size I wanted was inside the fabric edges.


I trimmed the right side and the top,


then I turned the block around and lined up the cut edges with the measurements on the ruler and made my final two cuts. These are perfectly trimmed.


The only drawback I see with this ruler is that there are no instructions with the tool. If you go to their website (www.blocloc.com) you can see exactly how to trim the blocks. 

The key part that I didn't know until I watched the video is that the Bloc_Loc logo on the ruler should always be placed on the lower side. That is the one that does not have the seam allowances underneath. Once I knew that it was very easy to position the ruler and trim my blocks. 

The video also shows how to trim quarter-square triangles accurately. This is definitely my new 'go to ruler' for trimming half square triangles. I used the 6-1/2" ruler but they even have a 12-1/2" BlocLoc ruler for larger blocks.


Tuesday, September 13, 2016

Product Review - Perfect Rectangle Ruler and more

I love it when I can combine testing a new product with a small project. I had a cute flannel panel fabric (Northcott's Flirty Birdies) in my stash and decided to make a cot cover quilt for my new granddaughter, Brooklyn. Two textured solids and a wavy stripe coordinated well.
I thought 'tipsy blocks' would be fun to make with the bird blocks so I decided to give the Creative Grids Perfect Rectangle Ruler a test run. The ruler's main function is to cut perfect rectangles that can be assembled to make half-rectangle blocks when the width is one half of the height. But these half rectangles can also be used to 'tip' square blocks.

I cut four 8" squares from the panel, followed the instructions with the tool to cut triangles from 8-1/2" wide strips and then sewed them to the square. The instructions that come with the tool are well written and illustrated.
The final step was to square up my blocks to measure 11" square.


I joined the blocks with sashing and prepared my quilt sandwich. I tried Pinmoors for basting. These are drum shaped rubber pieces that allow you to baste your quilt with straight pins. You push the sharp end of the pin into the Pinmoor. Since I have some arthritis in my right hand it was easier to use the Pinmoors than safety pins (my usual basting method). The pins stayed in place and were easy to remove as I quilted my small quilt.


And here is Brooklyn's first quilt - the first of many I'll make for her!

Wednesday, August 31, 2016

Product Review - Bottle Quilt


My friend Pat Yamin has been making 'one-patch' quilts for years. She has produced templates for many of the designs and I bought her 'Bottle' pattern and template when I was teaching in Hawaii a couple of years ago. 

I reviewed Marti Michell's templates recently and used some of the same products with Pat's template: 

Quilter's Slip-n-Grips are sandpaper 'dots' with adhesive backing. I put a few of these on the wrong side of each template to prevent slipping as I cut. They are effective and inexpensive insurance.


The other product I used when cutting around the templates is Olfa's 12-inch square Rotating Cutting Mat. Cutting the bottle shape from my fabrics was so easy and accurate.

To help with hand-piecing, Pat's templates have slots where you can mark part of the seam line. I used the Sewline marking pencil to mark the lines on the wrong side of the fabric shapes. This is my favourite marker for this job.

 
Pat's company is called 'Come Quilt With Me', and you will find her books and more than 30 different templates on her website. Not all the templates require hand-piecing. Machine stitchers will enjoy using the templates too. The marking slots ensure accuracy for designs that require starting or stopping 1/4-inch from the end of a patch for set-in seams.

I like using small short pins for both hand appliqué and hand piecing. The pins in the picture are Appliqué Pins by Clover. They are 3/4-inch long and don't get in the way like longer pins. I use a fine, medium length needle and neutral 50-weight cotton thread for hand piecing. I also run my thread along a thread conditioner called Thread Heaven. Whenever I am hand sewing I use this product, whether it is hand piecing or stitching down the binding on my quilts. The thread does not tangle as much when I use Thread Heaven.

I have made the small hand-pieced bottle quilt shown in the picture. I can't decide whether to keep going and make a larger piece or whether to just finish this small quilt as it is. My friend Rose thought it looked more like wine glasses so perhaps I will finish it to be a small mat for a tray when I serve wine at my next event.


Wednesday, August 17, 2016

Product Review - Marti Michell Templates and MORE!

A couple of years ago I taught the Stonehenge Woodland Block of the Month at a local quilt shop. This quilt was designed to use the Perfect Patchwork Templates by Marti Michell. Her company (From Marti Michell – www.frommarti.com) has a wide range of templates, specialty rulers, patterns and books. The Block of the Month used two sets of templates to make the 12 blocks in the quilt and the pieced sashing.


The wonderful thing about Marti's templates is that the extra 'corners' have been removed. You know what happens when you sew patchwork; you often have little 'ears' of fabric that need to be trimmed off. These are already removed with the templates. And some shapes are very difficult to piece since you may not be sure where to position the two fabric pieces.


I used two other tools along with the templates when demonstrating the monthly blocks to my students.

Quilter's Slip-n-Grips are sandpaper 'dots' with adhesive backing. I put a few of these on the wrong side of each template to prevent slipping as I cut. They are effective and inexpensive insurance.


The other product I used when cutting around the templates is Olfa's 12-inch square Rotating Cutting Mat. It is easy to hold the template in place with one hand, cut one side and then turn the mat with my other hand to cut around the rest of the template accurately.


Look closely at the photographs of the isosceles triangle and side triangles. You will see that the corners are precision designed so the cut edges match perfectly. You just need to match and sew. Since the corners are trimmed away there is less bulk in your seams and with sharp angles you are eliminating the pointed end of a triangle that is most likely to get knotted up in the throat plate of your sewing machine.

Monday, August 10, 2015

Product Review - Quilt Ruler Upgrade Kit

In January I reviewed Grip Strips™ by Guidelines 4 Quilting. These prevent rulers from slipping as I cut. That review is here.

The company has developed a new combination product, the Quilt Ruler Upgrade Kit. It promises to 'Mistake-Proof and Slip-Proof your 12" and 24" quilt rulers'. These tools allow you to cut accurate pieces and you never waste fabric by lining up your ruler on the wrong line. How many times have you done that?


The package contains enough Grip Strips for both a 12" and 24" ruler. The Fabric Guides are yellow plastic strips that are installed on the underside of your ruler. They are held in place by hooks that go over the short edges of the ruler and there is a stretch band that keeps the guide in place. You slide the guide up to the line for the strip width you want to cut. 

Grip Strip installed underneath my ruler.

Make your first straightening cut on the edge of your fabric and then slide the ruler over the fabric until the Fabric Guide's edge catches the fabric's edge and cut your strip.


I found the guide worked very well on my 12" ruler but when I used the guide on my 24" ruler I had to watch that it lined up correctly against the cut edge along the entire length of the ruler.


 I wouldn't install the guide if I was just cutting one strip but for multiple strips, the same width, it is definitely a time saver and prevents mistakes.


Tuesday, May 19, 2015

Product Review

I taught Free Motion Quilting in Yellowknife and students found this product helped them quilt more easily.

I use Machingers - soft, flexible, gloves. The fingertips are coated to provide a better grip as you place your hands on your quilt to move it around for free motion stitching.

I found my own skill improved when I started using these gloves many years ago.  I had tried other gloves but my hands just got too hot. 

Machingers are made from 'breathable' fabric that is comfortable to wear. I like how they are long enough to provide support to my wrist as well as my hand. Other gloves were too short and often were slipping so the gloves felt loose.

The gloves are available in 4 sizes and the package back includes a 'sizing' chart so you can select the best size for your hands.


I recommend these gloves so much that I am now carrying them in the Patchworks Studio Store. I have included the size chart so you can get the best fit for your hand size.

Order Machingers here
and see how YOUR free motion quilting improves too!

Tuesday, May 5, 2015

Product Review: Sew Red Glasses


A chance stop at a booth at International Quilt Market in Houston last fall yielded a fun (and useful) tool.
 
 
Sew Red glasses are used to determine colour value of fabric. You may be familiar with the Ruby Beholder tool that has been around for many years. These glasses work the same way but you don't have to hold the tool up to your eyes – you just put on the glasses!

I gathered some green and purple batik fabrics to see how the glasses worked. It is easy to arrange the green fabrics in value order without the glasses. Similarly, the purples weren't too hard to arrange.
 
 
Blending the two groups together was much easier when I wore the Sew Red glasses.
 
 
I got the regular glasses but there is also a 'clip-on' style.
 
Check their website: www.sewredglasses.com

Wednesday, April 22, 2015

Product Review: ScrapTherapy® Mini Scrap Grid & Sew Sassy Thread

Check out this EASY way to make mini 9-patches. And I do mean MINI – only 1-1/2" finished size. 


This is ScrapTherapy® Mini Scrap Grid, an invention by Joan Ford of Hummingbird Highway  and author of the book ScrapTherapy® Cut the Scraps

Joan uses every last bit of fabric to make amazing quilts. The printed fusible interfacing is the key to her method for 9-patches. She usually works with a cluster of nine 9-patches but for my test I decided to make just one 9-patch.


 The steps are very easy:

1.    Cut nine 1-inch squares. I used 4 light and 5 dark. Arrange the squares on the fusible side of the interfacing square inside the light dashed lines and iron in place.

2.    Sew the horizontal seams first by folding on the light dashed line and sewing on the solid line to get a perfect 1/4" seam allowance.

3.    Clip the intersections that are marked on the interfacing

4.    Arrange the seams alternately to reduce bulk when you sew the second set of seams. Press the block when you have finished sewing and you will have a 2" square 9-patch.

I framed my square with blue fabric strips, layered it with backing and batting and decided to try another Houston purchase for the quilting.

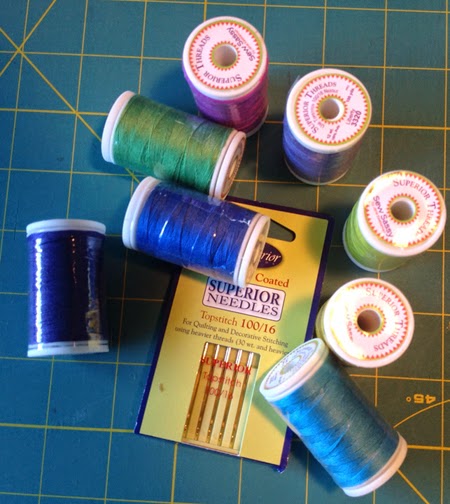
Superior Threads released a new thread recently. Sew Sassy is a 12-weight, 3-ply polyester thread designed with Jane Sassaman and for projects where you want the thread to be very visible. They recommend a Topstitch #100/16 needle to accommodate this thick thread.

I changed my needle and found the thread worked very well for both decorative stitches and straight stitching. I lengthened my stitch length for all the stitching tests and loosened my top tension slightly. I used Aurifil 50-wt cotton in the bobbin. 

A final trim with my wavy blade cutter and I have a fun little block that I will use as a mug mat in my studio.


Thursday, April 2, 2015

Product Review - Rotary Blade Sharpener

I have saved my used rotary cutter blades for many years in hope that someone would develop a way for me to sharpen them. I've tried a few but they were not very successful.


The most recent one I found is the TrueCut Linear Rotary Blade Sharpener by The Grace Company (www.graceframe.com).

It promises to 'Extend the life of your blade'. The sharpener comes with detailed instructions for sharpening. You don't have to hold it in place when sharpening so there is added safety. 

I tested one of my saved blades and then cut a double layer, then 4 layers and then 6 layers. I had no trouble cutting 2 and 4 but cutting 6 was a bit more of a struggle. This tool will extend the life of my blades and I will use it next time I find myself having to press harder to cut. They also make a motorized sharpener so you can sharpen your blades with the push of a button!